Candied Blood Oranges
Laura sovacool ‘20
Alright guys, I know what you’re thinking: this is NOT a tasty video! You are one very observant and correct reader! The Tasty team has kind of been out of commission this month. We are all out of whack from choir tour: I slept for 13 hours straight, Dede has stomach ulcers, and Dylan… well I guess he’s been fine. Regardless, I wanted to attempt to candy some blood oranges for you. If you don’t want to hear me drone on about how this idea came to be, feel free to scroll down to the pictures.
It all started on Saturday when my grandmother so kindly drove me to get my oil changed. She not only got me a coffee but also brought me some organic blood oranges which were “delicious but too aggressive on her tongue”. I had never tried a blood orange in my life, but quickly discovered that they were indeed “aggressive”. At this time, the Tasty squad had no intention of making a video this month. We tried spitballing ideas but no one had the time or the mental strength after those croissants last month (thanks Dylan). So, after tasting these blood oranges, I thought the simplest thing to do would just be to throw them in sugar water and cook them until they were no longer sour. I pulled up Pinterest on my computer and began searching for an easy recipe. After about 10 minutes of this, I called Dylan to ask him what he thought. I told him the only recipe I could find called for me to dry the orange slices for at least 24 hours. He laughed, told me to get off of Pinterest and to write this down:
Candied Blood Orange Recipe:
Mix 1 cup water and 1 cup sugar in a pot
Mix on med-low heat
Once mixture is dissolved, heat liquid to medium heat, let simmer while adding the thinnest orange slices you can to the mix, then return to med-low heat.
Cook until the white part of the orange (which is apparently called the Pith) is translucent, flipping occasionally. Or in my case which is when you just can’t wait any longer.
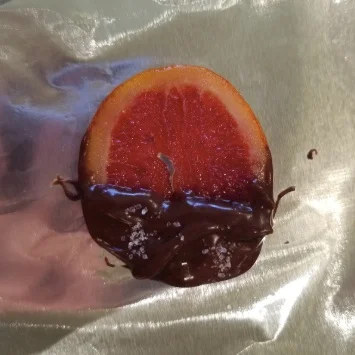
Remove them and place them on aluminum foil to dry/cool for about an hour.
The next day, I walk into my kitchen and start cutting the oranges. I let the mixture simmer while adding the oranges. I stir them around so as not to let the sugar mixture burn. After a while, the sugar water turns red, and a lovely aroma of orange fills my kitchen. I’d say I spent around 20 minutes making seven candies but I used a small pot. After waiting about an hour, letting them cool and set, I found that they were much more like gummies than hard candy. I understood why the Pinterest people wanted me to dry them out first. I personally enjoy gummies, so this wasn’t a disappointment. I wanted to spice the end product up a bit, so I melted down some milk chocolate chips (we were out of dark chocolate) and sprinkled some salt over it. By themselves, the candies were gooey and maintained a good balance of citrus and sugar, but the chocolate and sea salt expanded the richness of its flavors. Ignoring Dylan’s pleas to temper the chocolate, I made a simple ganache (a combination of chocolate and cream) which took about a minute to melt. All in all this dessert was easy to make and fun to eat.